Monday, July 30, 2012

Your Worst Summer Hair Problems – Solved!


Frizzy hair, sunburned scalp – isn't summer fun? Sure, we love the summertime, but that doesn't mean we don't spend those three months griping about the flat strands, outrageous frizz, sun-bleached color, the list goes on. If you're like us and adore the warm weather but hate the bad hair days, keep reading for the best solutions to the most common summer hair woes.

Weather Woe: Sunburned Scalp
Oops! You didn’t know you were supposed to grease your scalp with SPF along with your shoulders, face, legs, back, etc. Don’t worry; the scalp is one of the most commonly missed spots, when it comes to SPF. Who wants a greasy scalp full of SPF anyway? We suggest a summer hat or a scarf to match your bathing suit.


Weather Woe: Split Ends
It’s true, the sun, the sand and surfing can all be pretty rough on your hair, but it is really the heat that causes split ends. Dried-out ends turn brittle and start splitting apart, we suggest running into Josephine’s for a Botanical Treatment and trim, ASAP!

Weather Woe: Frizz from Humidity
During the summer, the hair cuticle absorbs the added moisture in damp air, causing it to expand, which creates that lovely frizz. The best defense against this poufy effect is a smoothing product, such as Aveda’s Smooth Infusion Style-Prep, or Aveda’s Be Curly Style Prep. Both perfect for either straight or curly hair—they do weather wonders!

Weather Woe: Faded Color
Getting a few too many rays isn’t just damaging for your skin, it can be harmful to your color too! We suggest using a color preserving shampoo and conditioner—and by that we mean Aveda’s Color Conserve. We also think you should come into either Josephine’s location for a toner! This adds shine, preserves color, and adds vitamins and nutrient back into your hair! It lasts up to 6 weeks—perfect for the summer.


There you have it, your worst summer hair woes—solved!

Josephine’s 3-Step at Home Manicure


Everyone gets a little preoccupied during the summer, whether it is with a pool party or a beach day. Sometimes we forget to make a little quality time for ourselves! Josephine’s has put together an at-home manicure guide to help out with those weeks that are a little too fun-filled.

Step 1: We like to shape and file the nails first, if you soak them and then file, the nails will split and tear, (which can also lead to chipping and peeling) since the nail does not provide a perfectly smooth base. Shape your nails to your preference. Our favorite is rounded-square nails—you can never go wrong!

Step 2: If you’re short on time, run your hands under ice-cold water. This does not dry nails faster, but it helps to harden the polish, which in turn helps to prevent nicks during the drying process. This also helps to keep your polish looking fabulous longer.

Step 3: Don’t forget the finishing touch! You should always top off every manicure with top coat. Our personal fave is OPI Top Coat, or Nail Tek Quicken Dry.
So there you have it, three great tips from our Josephine’s Nail Specialist— they really know how to make hands look great. Now go grab a bottle of polish and put them to use!


Tuesday, July 24, 2012

Do it yourself: Sassy Summer Nail Design


Nail art is more hot than ever, and making a huge commotion this summer! Save your cash for the beach resorts, and try Josephine’s Do-it-yourself steps for this nail design! This style is definitely WINNING!


Step One: Polish your nail with a color of your choice. Jazz up your swim gear and pick a color that matches it! 

Step Two: Let your polish dry, and apply clear coat. 

Step Three: Just before the clear coat dries completely, place the small plastic netting over each nail, and sponge or sprinkle the loose glitter over each nail.

Step Four: If you’re satisfied with the placement of the glitter, go over each nail with clear coat, to hold the glitter in place.


Now, you’re fabulous! Go out and rock your new nail art, courtesy of Josephine’s BlogSpot Tips!

Josephine's Fast Fixes for Beauty Barriers


Beauty Barrier: Red Lipstick on your pearly whites.

Fast Fix: Directly after applying lipstick, always press crimson-color lips onto a folded square of tissue to blot. Then stick your forefinger in your mouth and slowly pull it out to remove any lipstick that you may have mistakenly applied on the insides of your lips (this step is crucial).
Tip: Swipe a super-thin coat of Vaseline across your top row of teeth; it’s far too slick for lipstick to adhere.
Beauty Barrier: Loose eye shadow fallout under your eyes.


Fast Fix: When applying shadow, fold a single square of tissue and hold it underneath each eye. It will always catch any loose pigment fallout while protecting your freshly done foundation. This works wonders!

Beauty Barrier: Clumpy Mascara.

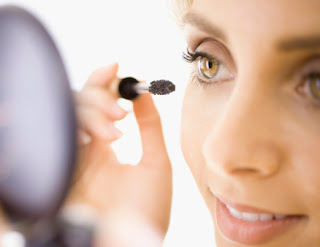
Fast Fix: First things first, throw away your mascara—it’s most likely expired. Second, gently clamp your lashes with a baby wipe between your forefinger and thumb, and pull lashes all the way through to remove any excess mascara. Then put a little Vaseline on your fingertips and lightly run them across the tips of your lashes to separate, darken, and define them. For a more dramatic look, use Aveda’s Mosscara to darken your lashes natural color. Lightly swipe your top lashed.
Beauty Barrier: Way too much blush.


Fast Fix: For powder blush, liberally dust Aveda’s loose translucent powder over your cheeks to diffuse the color. If you’re wearing cream blush, tone it down by sponging an ever-so-slight amount of Aveda’s Tinted Moisturizer on top.
Beauty Barrier: Orangey fake and bake.

Fast Fix: Keep a liquid bronzer on standby to hide streaks and quickly distribute color to any areas you may have mistakenly missed. If that’s too sheer, dust over it with bronzing body powder for a sexy, evenly tan finish.

Beauty Barrier: Frizzy Flyaways.


Fast Fix: As silly as this may sound, if fighting the frizz is a daily plight, you might want to keep a box of dryer sheets under your bathroom sink as well as in the laundry room. Rubbing one over your hair drastically reduces humidity-related static cling, allowing fussy strands to fall right into place.
Tip: If that doesn’t happen to do the trick, use Aveda’s Control Paste for a more heavy duty defense.
Beauty Barrier: Yellowish tint to your fingernails or toenails.

Fast Fix: To restore your nail beds to your natural nude color, mix a few drops of fresh lemon juice with ¼ cup of hydrogen peroxide in a plastic bowl. Completely saturate a few cotton balls in the mixture and rub your fingernails and toenails until the stain is removed.
Tip: In the future, be sure to double up on your base coats!


Thursday, July 19, 2012

Surprising Facts about SPF—Just in Time for Summer


So, we’ve all heard the basic facts about sunscreen: “apply 15-30 minutes before sun exposure; wear daily to prevent premature aging; reapply after swimming.”
But we’re still left with some questions— can you use leftover sunscreen from last year? What about tinted moisturizer with SPF—is that enough?
Josephine’s has all the answers to your skin care needs—keep reading!

1. Makeup with SPF isn't enough to protect your skin.
To actually benefit from SPF usage, you need to apply one teaspoon for the exposed areas of your face and neck—way more foundation or powder than you’d ever need. You should always put on a good base of sunscreen on every day.

2. You have to reapply every two hours--no exceptions!
One application isn’t enough to protect your skin all day, whether you’re swimming or not. Even the best sunscreens, with high amounts of SPF need to be reapplied every two hours. Here’s a tip: If you’ll be out in the sun for long periods, set a reminder on your phone to reapply.

3. Sunscreen is a must even when you're indoors.
Have you noticed more freckling or discoloration on the left side of your face? That’s likely a result of UV rays penetrating through your driver’s side window. UV rays aren’t blocked by clouds or glass, which means you’ll need plenty of SPF even if you spend your days at a desk.
Do you want to find a “cure” for the discoloration that you may already have? Aveda’s Enbrightenment Skin Care Line is fabulous! Ask one of Josephine’s Skin Care Specialist’s for details—or even better, book for an Enbrightenment Facial at either Josephine’s location! 

4. Expired sunscreen can do more harm than good.
Using an expired sunscreen can obviously lead to reduced protection from UV rays due to diminished SPF, but expired formulas can also contain bacteria and fungus growth (yikes!). Sunscreens degrade in hot temperatures, so those left in the glove compartment, for example, might lose their effectiveness well before the expiration date. If your sunscreen or SPF doesn’t have an expiration date, toss after one year.
Hope these tips help; now go get you some sunscreen!